
 Chair Upholstery Lesson 2: Structure
Despite Google Maps shouting from the footwell of my car that I should have turned left 200m away, I arrived early last week and waited in my car for the upholstery queen to roll up the door to my learning. By the time she did, our little gang was complete and eager in the car park. When we heard the throaty screech of metal moving, we all jumped out, unpacked our homework from the boots of our cars and made our way like broken snails to the workshop. The girl next to me smiled weakly as her pile of old chair skin fell to the ground. She tried twice to pick it up, each time she juggled with her mid-century frame and failed. I was concentrating too hard on my own pile to be of much help, but I did stand and wait patiently until she motioned through gritted teeth that I should carry on.
 In the first 10 minutes I learnt that everyone had struggled, everyone was amazed and frustrated by the number of staples and tacks that needed removing. Some had enlisted different tools to those recommended, some had used their husbands, some, like me, had doggedly continued and were now wearing plasters, mostly on our index fingers. One girl had bought a staple remover which she swore by. Another lady sadly ran her hand up and down the wooden frame of her chair asking if anyone else had leftover bits of metal in their wood. We all agreed it was more difficult than we had imagined, that upholstery fabric was very expensive and that we were all gagging to use the air staple gun that was sitting at our stations. First, we had to learn the theory.
OK gang STRUCTURE, take notes.
The lesson had officially begun.
I learnt about support structures.
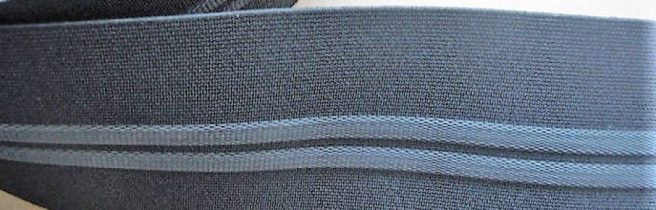
Elastic webbing, which cleverly has stripes to show you it’s sitting strength, is used with foam. 3 rest, 4 sit, 5 jump. Foam has it’s own code, which I can now understand, so will no longer have to sit on every kind in the shop before purchase. Webbing spreads the load and by weaving it you create a solid platform. Then followed explanations on folding, stretching stapling and deck fabric options.

Then there is Jute webbing, much cheaper than the elastic stuff but you have to use special stretching tools. We were shown a pleasant looking peg and paddle affair and a disturbing gooseneck version with very long and concerning spikes, which looked like it belonged stored by the side of a torture rack. Either is used to tighten the jute until it pings like a drum.
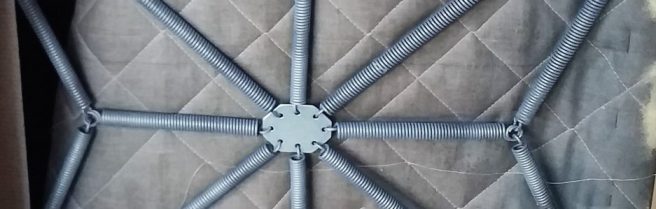
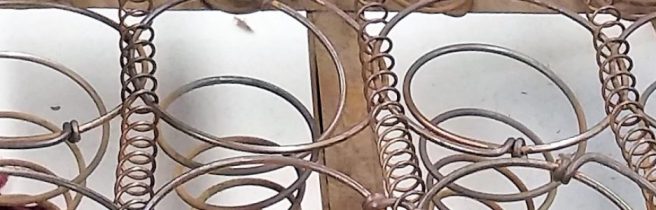
Then came the springs. Long tension springs, like the ones on my chair. You can easily hook them on and off but beware, take a picture first, so you know how to put them back!
Then you have your zigzag springs which are no sag and easy to use and attach. I have these on the back of my chair. We learnt how to sew them in place and tie knots with twine.

Then we were all suitably impressed by the traditional coil springs which are really antique now and only found in very high-end furniture. My chair does not have these, but the beauty of this class is that someone else’s did. We oohed and aaahhed at the complexity of the metal skeleton. This is a whole new world and skill level, not for this class. The girl with the springs was given the hard word and told to find another project. The thing I found most helpful was how to work out if a spring is still good.
Guess what your push it, lol, if it goes sideways it’s old and needs replacing. There is a wise quote in there somewhere.
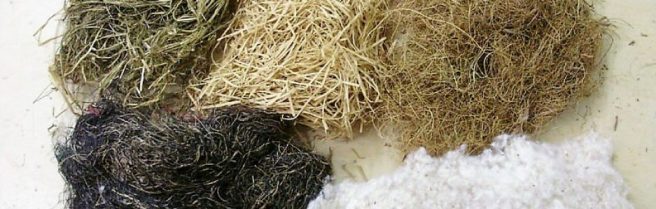
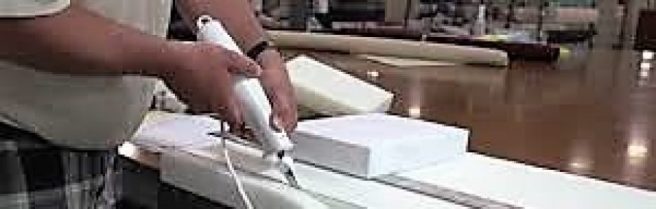
Next stuffing; cotton rags, moss (yes actual Spanish moss that grows on trees), wood wool, straw and horsehair. Then on to foam which I have learnt can be cut with an electric bread knife, scissors or an expensive foam cutting tool. When cutting you need to weigh it down, here a ream of A4 is used and cut along an edge to guide you. Foam can be glued together with a contact adhesive, and sheet foam can be used as a topping for a smooth professional finish.
We learnt about glues and staples and then polyester wadding which is an upholster’s best friend. It can be stapled, glued or sewn and is the model’s thick foundation in this world, hiding everything and smoothing the way for your fabric.
THEORY DONE
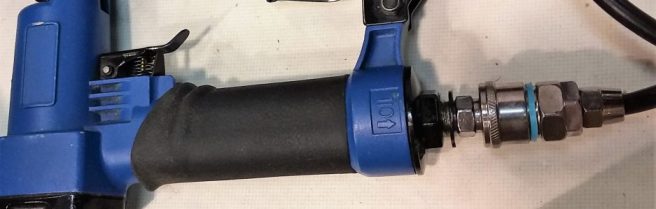
On to a demonstration of using the air gun stapler. We all put our goggles on and jumped and giggled as Antonia made a neat row into a dummy board. We all had a go and mine was the straightest and used as the perfect exampled, just saying.
HAHAHAHA
Despite being the owner of a retail outlet of all things upholstery, our teacher showed great thrift when accessing our chairs. She walked around and made us all write down what we would need to buy. My structure was deemed fit for use until it next needed recovering; all the above was irrelevant to me then, but good to know. All I had to do was replace the cover that stretched over the springs – I can not remember the name- if I wanted and cover the exposed foam back with the wadding.
")
")
A giant and tempting roll of polyester hung suspended above the workspace and we were told to help ourselves to it and write down what we had taken. I resisted the urged to turn the workshop into a Christmas snow grotto and cut off my 1.5m in a very grown-up way. covered my chair and stapled it on. Lesson 2 done.
Just before I left I shared my cutting layout template. I was wrong, I had forgotten all about those arrows.
All the arrows need to be the right way….of course they do???? Sigh, staple success was forgotten.
Maybe I will do better next week, cutting the fabric, I’ll let you know.


Im learning so much by reading about your upholstery adventures. I am sadly unprepared for my project, please keep posting 🙂
LikeLiked by 1 person
That’s so cool. It is actually very easy when you have learnt it!!
LikeLiked by 1 person
quite interesting post!
LikeLike
hahaha ta.
LikeLike